If you’re like me, you have scoured the internet high and low in search of the perfect content calendar for your business or your clients. While there are some great tools, like CoSchedule, available, they either have too many features I don’t want or need or do not have enough features to make them practical. This is where Google Calendar comes in. Before I get into the details of how I create content calendars with Google, I want to preface with this:
- We use Google Workspace at Foot Over, and this post is specific to using Google Calendar.*
- My specific use case for this calendar is transparency and organization. This is not intended to replace project management, but having everything plotted out and scheduled can definitely help with that.
Creating your calendars
When you log into Google Calendar, you see your own calendar and all the ones you currently have access to. I hid the details for this post to prevent you from stalking me and showing up at my meetings. The first thing you’ll need to do is create your calendars by adding a new one. Repeat this step until you’ve added every channel you use for your organization.
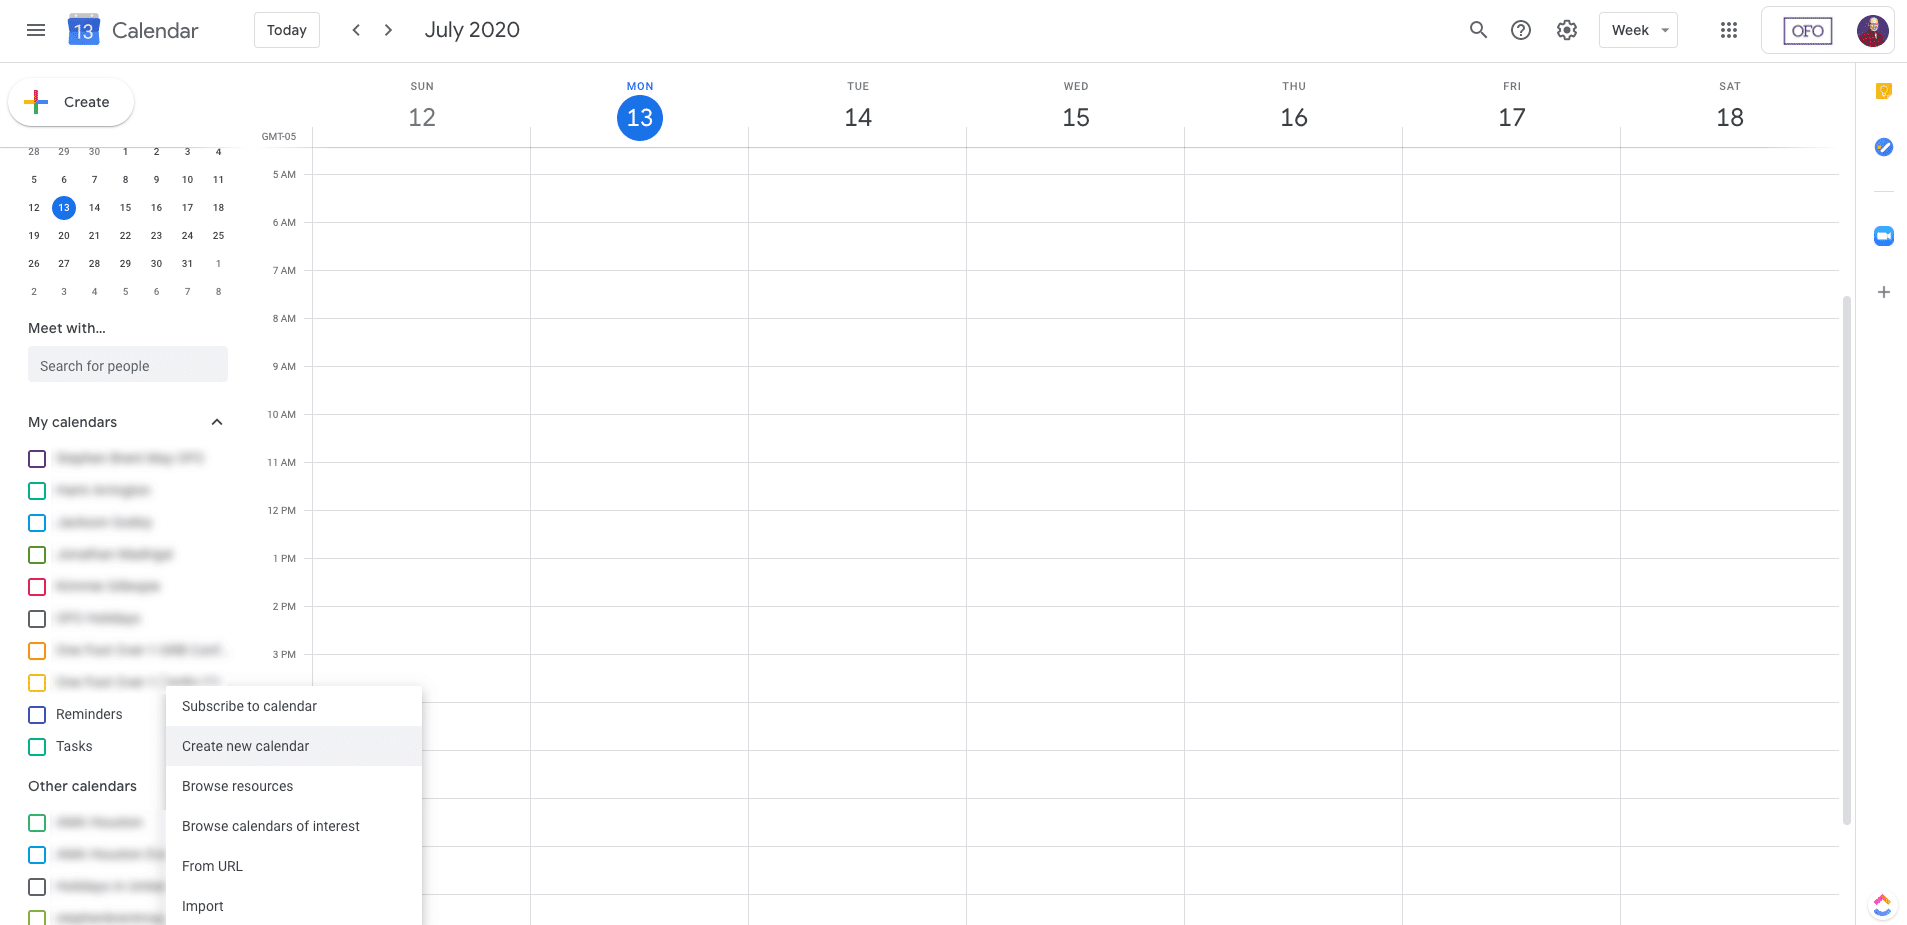
You need to decide how granular you want to get with your content calendars. For example, you could create one calendar called Social Media or a new calendar for each social channel. In this example, I created one for each channel we use at One Foot Over. Next, name your calendar according to the channel.
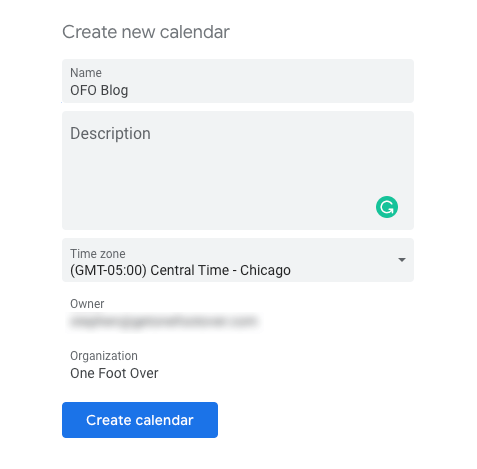
Repeat this step and add every channel you use for your organization.
Adjusting the settings
Once you’ve added all your calendars, the left navigation of your Google Calendar should look something like this:
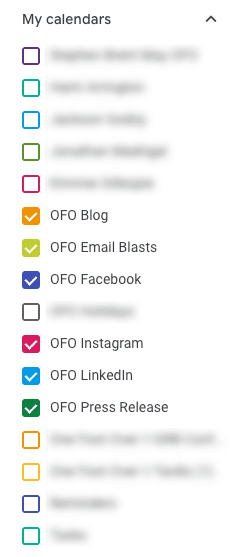
If you hover over a specific calendar, you will see three dots that give you some options. Change the color of each calendar so it’s easy to know what’s scheduled to go out at a quick glance. You’ll see why a little further down.
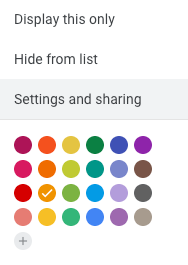
By clicking on Settings and sharing, you’re taken to a page where you can grant access to other people inside or outside your organization.

When you add people to your calendar, you have full control over whether they can modify, move, or delete things or view only what you have added. If you manage content for your organization but your boss wants to know what’s happening when, you can give them access to view the calendar without allowing them to change anything.
Adding your content
Now is when the real fun happens. Start adding your content the same way you would add any other event to your calendar. If you’ve already shared the calendar with your team and they’ve added it to their own calendars, there’s no need to Add guests in the event.
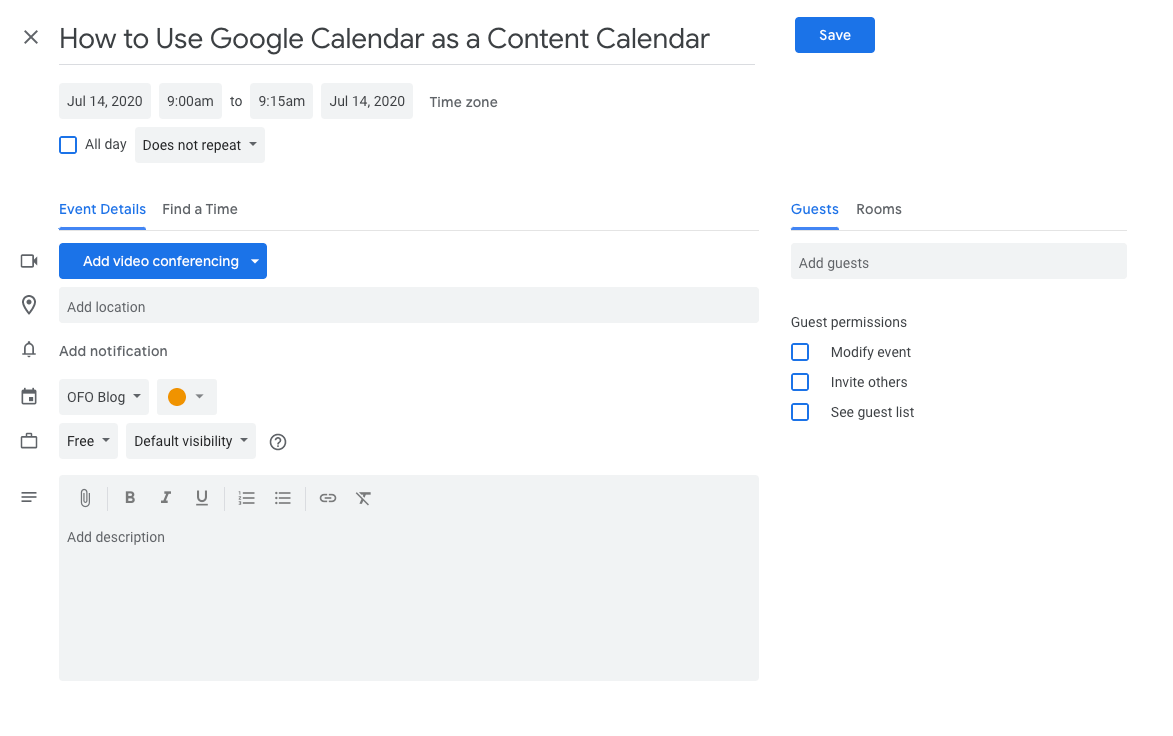
A few suggestions:
- Use the working title of the content as the name of the event.
- Set the date and time as the date and time you plan to publish it.
- Next to the calendar icon, you can modify which calendar the specific piece of content is intended for.
- In the text box, add any relevant details, such as links to images, the document where you’re creating content, etc.
Once you’ve added all your content, you will have a calendar that looks like this:
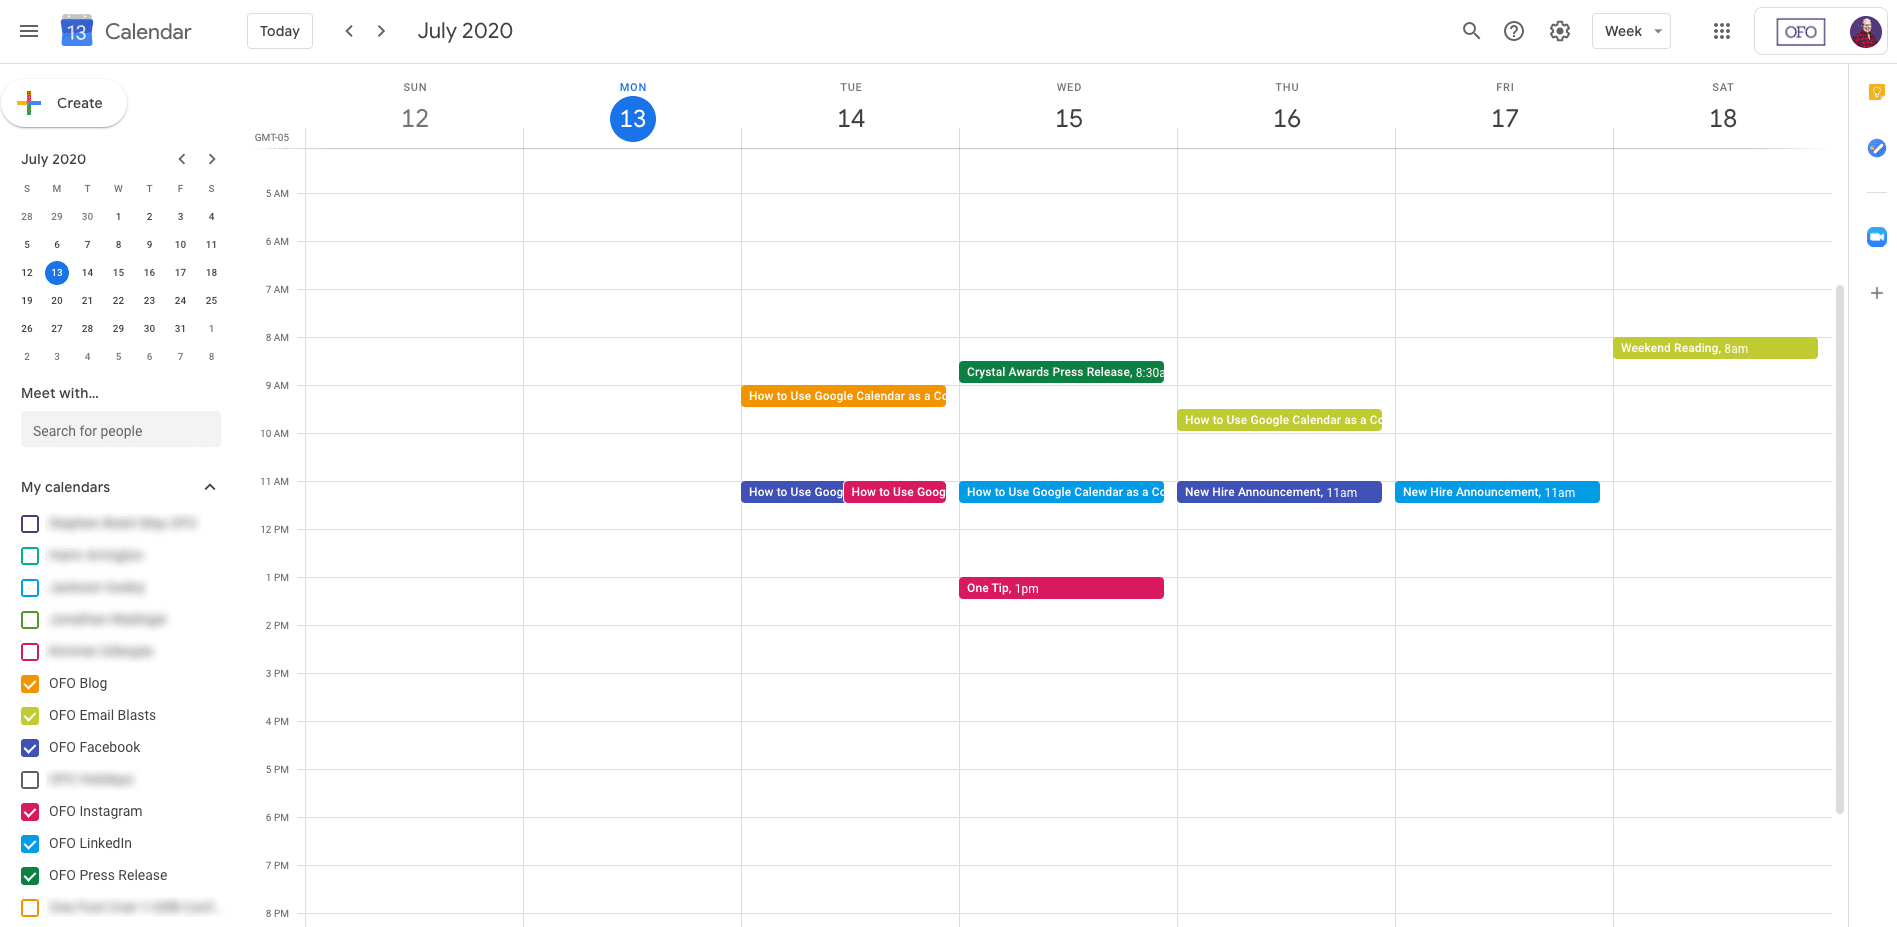
It’s a beautifully organized, color-coded piece of calendarized awesomeness. I can easily look at this and know what is being published and when. If I don’t want to see it, I can toggle it on and off by checking the box next to the calendar name. I realize this may not work for everyone, but if you haven’t found a solution that works for you, give this a try. Not only is it easy to set up and maintain, but it’s also free if you’re already using Google Calendar. If you already have a solution that’s easier than this, I’d love to learn about it.
*You can probably do something similar with Outlook, but then you’d have to use Outlook and who wants to do that?


